The first step in my adventure was to first create a location to store my web content. The mostly likely location for this was GitHub. The process for signing up for a GitHub account is pretty easy so I won’t bother going through that process here. I’m going to assume that you figured that part out and I will begin with that assumption.
Setting Up a Private GitHub Repo
Once you have your account, you’ll need to next setup your very first repo. Login to GitHub and click on the “New” button to create a repo 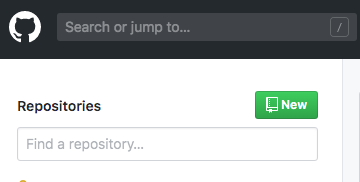 On the resulting screen: 1. Enter a name for your repo
2. Enter a description if you like
3. We’re creating a private repo here because we don’t want anyone messing with it or having access to it (more on that in a future post).
4. Let’s also initialize the repo with a blank README. This way you can add notes to the repo later if you have anything specific to remind yourself of
On the resulting screen: 1. Enter a name for your repo
2. Enter a description if you like
3. We’re creating a private repo here because we don’t want anyone messing with it or having access to it (more on that in a future post).
4. Let’s also initialize the repo with a blank README. This way you can add notes to the repo later if you have anything specific to remind yourself of
The configuration should look something like this:
 5. Click the Create repository button and like magic you have your very own Private repo!
 Make note of the “Private” listed at the top of the repo. This lets you know that the repo is not available to the public on GitHub. Only those that have been specifically granted access will be permitted to view the contents and make changes. ## Granting Access to the Repo Via Deploy Keys
Now that we have this private repo created, we need to be able to grant access to it for anyone or anything that will want to make changes to it. In order to do this, we’re going to generate a SSH key on our client machine so that we can have access via CLI (Sorry, I work is much from CLI as possible). These instructions will help you generate the ssh key and add it to the repo’s settings. ### Generating the SSH Keys
First, we’ll need to generate our ssh keys that we intend to use for the repo. To do this, pop open a terminal window and run the ssh-keygen command as shown below. We’re going to make this key capable or performing Read and Write operations in our repo so be sure to supply a password when generating the key.
imacs-imac:~ scott$ ssh-keygen -t rsa
Generating public/private rsa key pair.
Enter file in which to save the key (/Users/scott/.ssh/id_rsa):
Created directory '/Users/scott/.ssh'.
Enter passphrase (empty for no passphrase):
Enter same passphrase again:
Your identification has been saved in /Users/scott/.ssh/id_rsa.
Your public key has been saved in /Users/scott/.ssh/id_rsa.pub.
The key fingerprint is:
SHA256:o16ykEsBSueHW4G/Qu4a/5U26nfYsdrdbAUkxN60xFk [email protected]
The key's randomart image is:

+---[RSA 2048]----+
|          o.. oE |
|    .      o *   |
| ..o .    . * .  |
|..o.o .    . +   |
|.  +.+  S     .  |
|  o +o…o     . |
| . ++.o=+ o   .  |
|  +..++*o+. o.   |
| ..o+++.o. ..o   |
+----[SHA256]-----+
This is generating a new ssh key that is protected by a password. The key will be called id_rsa and be located in the default location of ~/.ssh.
Adding the SSH Key to Our Repo
Now that we have our SSH Key, we will need to give it permissions to our repo. We go back to our repo on GitHub and click on the Settings link towards the top of the screen. From there, click on the Deploy Keys link on the left navigation menu. You should be looking at a screen similar to the below page:
 Click the Add Deploy Key button on the Deploy keys page. Go back to your CLI (or however you wanna get the contents of the file) and dump the contents of your public key file (aka the one that ends in .pub). The private one (aka the one WITHOUT .pub should not be shared with anyone). You can see below how I’ve gotten the contents using cat.
imacs-imac:~ scott$ cat /Users/scott/.ssh/id_rsa.pub

ssh-rsa AAAAB3NzaC1yc2EAAAADAQABAAABAQDCHVTkeP69+YLgiyWx9+DQ9TFftis6kiJMDTr/hi4nqzHlGdDUR78fy/kfAzU
Wu5cwaiuTpxvXtFK2FA+qrAoNqOzKecaVRv017PxznbRQhZ+FIfbKRua3Gt3rGSzrMvOErmL1He23jO5OZZAqpkt97E5kGO1gFmt
fb90moXDyE0GC6s/3dVcZdEDw+uge6toBF9BGO27lFtdwIs3x3rUj88BcACfi0D/0nkFxK3UjgaEuAcICpneKfVhd/jY5DnguCD5ST5lTi
Z/9hNDKfU4L1sQ0jz9gdmGhBpxpW3lRYWxBHadxKNYZFSI0IFO5VAFecNzgo/eSerIi2A9ahmTX
[email protected]
Copy the entire contents of this file and go back to the Add deploy key screen on GitHub. Paste the contents into the Key field. Give it a Title and be sure to check the Allow write access box as shown below:
 Once that is done, click the Add key button to add the key. If you were successful, you should see something like the following:
 ## Synching With Our Repo
Now that we have the repo setup and access granted, we’ll want to do our first commit to it. In order to do that, we first need to add our ssh repo key to our ssh agent. We do this by using the ssh-add -k command. This will prompt for the password you used when creating the key and upon successful authentication, your key will be added.
imacs-imac:~ scott$ ssh-add -k /Users/scott/.ssh/id_rsa
 Enter passphrase for /Users/scott/.ssh/id_rsa:
 Identity added: /Users/scott/.ssh/id_rsa ([email protected])
 imacs-imac:~ scott$
With the key loaded, we should be able to clone our repo to our local machine. First we can cheat by getting the clone link for our repo. Go back to the main repo page by clicking on the name of the repo at the top of the page (next to the “Private” tag). This should bring you back to a page similar to this displaying your empty README.
 Click the Clone or download button to reveal the link to your repo and then copy the link. The link should look something like:
[email protected]:<my_git_user>/mysamplerepo.git
where my_git_user is your GitHub username. With that copied, let’s go back to our terminal and do a clone to get the repo on our local machine.
imacs-imac:~ scott$ git clone [email protected]:<my_git_user>/mysamplerepo.git
 Cloning into 'mysamplerepo'...
 The authenticity of host 'github.com (192.30.253.112)' can't be established.
 RSA key fingerprint is SHA256:nThbg6kXUpJWGl7E1IGOCspRomTxdCARLviKw6E5SY8.
 Are you sure you want to continue connecting (yes/no)? yes
 Warning: Permanently added 'github.com,192.30.253.112' (RSA) to the list of known hosts.
 remote: Enumerating objects: 3, done.
 remote: Counting objects: 100% (3/3), done.
 remote: Total 3 (delta 0), reused 0 (delta 0), pack-reused 0
 Receiving objects: 100% (3/3), done.
 imacs-imac:~ scott$
You should now have a directory called mysamplerepo on your machine.
imacs-imac:~ scott$ ls -al mysamplerepo/
 total 8
 drwxr-xr-x   4 scott  staff  136 Dec 20 15:41 .
 drwxr-xr-x+ 22 scott  staff  748 Dec 20 15:41 ..
 drwxr-xr-x  13 scott  staff  442 Dec 20 15:41 .git
 -rw-r--r--   1 scott  staff   14 Dec 20 15:41 README.md
Now we’ve got a local copy of our repo…yaaaaay!
Committing Our First Change From Local Machine
Now that we’ve got our repo, we’ll want to next set this up for some feature articles. The first step is to create an html directory within the repo and add a simple html file to it.
imacs-imac:mysamplerepo scott$ mkdir html
 imacs-imac:mysamplerepo scott$ cd html/
 imacs-imac:html scott$ vi index.html
Inside the index.html, I put our obligatory “hello world” for now.
<html>
 <body>
 hello world
 </body>
 </html>
Save the contents of the file (:wq) for those following along with CLI. From there, we’ll need to add our untracked files…aka git add and then commit the changes and push them to the repo.
imacs-imac:html scott$ cd ..
 imacs-imac:mysamplerepo scott$ git add .
 imacs-imac:mysamplerepo scott$ git commit -a
 [master 6d43978] Creating our first deployment
  Committer: Scott <[email protected]>
 Your name and email address were configured automatically based
 on your username and hostname. Please check that they are accurate.
 You can suppress this message by setting them explicitly. Run the
 following command and follow the instructions in your editor to edit
 your configuration file:

     git config --global --edit

 After doing this, you may fix the identity used for this commit with:

     git commit --amend --reset-author

  1 file changed, 5 insertions(+)
  create mode 100644 html/index.html
 imacs-imac:mysamplerepo scott$ git push origin master
 Warning: Permanently added the RSA host key for IP address '140.82.113.4' to the list of known hosts.
 Counting objects: 4, done.
 Delta compression using up to 4 threads.
 Compressing objects: 100% (2/2), done.
 Writing objects: 100% (4/4), 368 bytes | 368.00 KiB/s, done.
 Total 4 (delta 0), reused 0 (delta 0)
 To github.com:algattsm/mysamplerepo.git
    89800ef..6d43978  master -> master
 imacs-imac:mysamplerepo scott$
I cheated and just moved up one directory so I’m sure to add the html directory and the contents of it to my commit. Running git add . will make sure we grab all of the new (aka untracked) files to the commit. Then the git commit -a says to comment all of our changes and we give a reason. Finally, the git push origin master commits all of changes to our repo. Let’s go check and see if this all happened properly.
If you go to GitHub in your browser again and refresh the page, you should see the html directory and it should contain the index.html file we created.
 Looks like I did something right! Hopefully at this point, so did you.
What Does it all Mean and What’s Next?
Glad you asked. It’s means nothing at this point but it’s a step in the direction I took. At this point, you and I should be successful at creating a private repo and being able to publish content to it. High-five bro! Until the next article!