Deploying Nginx + PHP + git-sync on Kubernetes

In my previous post, I explained how to setup a simple nginx instance that could be used to sync to a private Git repo. The only drawback is that this setup will only serve static pages. What if you wanted to be able to run a server with dynamic code like PHP? I’m glad you asked! In this post, we’ll update our config to include a php-fpm instance to allow us to serve PHP pages.

I have planned these articles out so that they build on each other. With that in mind, I’m assuming you have followed my articles to date and therefore we’ll be simply extended the current deployment.

If you’re impatient like me, just scroll to the bottom and download the full files.

Setting Up The PHP-FPM Instance

First we need to get our PHP-FPM yaml setup. By default, php-fpm runs on port 9000. This means we need a service definition to expose this to the cluster. This will also need access to the git repo we created so we’ll add in the git container spec. Instead of running the nginx image, we’ll run the php-fpm image. In order to make life easy on ourselves, I’m going to use the webserver.yaml from my previous post as a template. I’m going to make the following changes to it:

  1. Replace any reference of “webserver” with “phpfpm”.
  2. Change the following in the service definition
    1. change the port name from http to phpfpm
    2. change the port number from 80 to 9000
  3. Remove the ConfigMap
    1. Remove the definition of it from the top of the file
    2. Remove the references to it in the spec volumes and the container volumeMounts
  4. Change the image of the second container from nginx:latest to php:fpm
  5. Change the containerPort from 80 to 9000

If we’ve done this all correctly, we should have a yaml that looks similar to the below:

apiVersion: v1
  
 kind: Service
 metadata:
   name: phpfpm
   labels:
     tier: backend
 spec:
   selector:
     app: phpfpm
     tier: backend
   ports:  
   - name: phpfpm
     port: 9000
 ---
 apiVersion: apps/v1
 kind: Deployment
 metadata:
   name: phpfpm
   labels:
     tier: backend
 spec:
   replicas: 1
   selector:
     matchLabels:
       app: phpfpm
       tier: backend
   template:
     metadata:
       labels:
         app: phpfpm
         tier: backend
     spec:
       securityContext:
         fsGroup: 65533 # to make SSH key readable
       volumes:
       - name: dir
         emptyDir: {}
       - name: git-secret
         secret:
           secretName: github-creds
           defaultMode: 288
       containers:
       - env:
         - name: GIT_SYNC_REPO
           value: [email protected]:<some user>/mysamplerepo.git
         - name: GIT_SYNC_BRANCH
           value: master
         - name: GIT_SYNC_SSH
           value: "true"
         - name: GIT_SYNC_PERMISSIONS
           value: "0777"
         - name: GIT_SYNC_DEST
           value: www
         - name: GIT_SYNC_ROOT
           value: /git
         name: git-sync
         image: k8s.gcr.io/git-sync:v3.1.1
         securityContext:
           runAsUser: 65533 # git-sync user
         volumeMounts:
         - name: git-secret
           mountPath: /etc/git-secret
         - name: dir
           mountPath: /git
       - name: phpfpm
         image: php:fpm
         ports:
         - containerPort: 9000
         volumeMounts:
         - name: dir
           mountPath: /usr/share/nginx 

We can now save this yaml and apply it to our cluster:

# kubectl apply -f phpfpm.yaml 
 service/phpfpm unchanged
 deployment.apps/phpfpm configured

Assuming all went well, we should now have our webserver and phpfpm containers up and running:

# kubectl get pod
 NAME                         READY   STATUS    RESTARTS   AGE
 phpfpm-b46969c5f-zzh6d       2/2     Running   0          103s
 webserver-8fb84dc86-7xw4w    2/2     Running   0          10s

That’s just lovely but what next?

Configuring Nginx for PHP

At this point, we basically have two unassociated containers that are living independently in the same cluster. The only common bond is that they have the same set of files synched from the Git Repo. Next, we need to tell nginx to handle PHP requests and where to send them. This will require us to update our Nginx configMap. We do this by adding a location statement to handle php files like so:

      location ~ .php$ {
           try_files $uri =404;
           fastcgi_split_path_info ^(.+.php)(/.+)$;
           fastcgi_pass phpfpm:9000;
           fastcgi_index index.php;
           include fastcgi_params;
           fastcgi_param SCRIPT_FILENAME $document_root$fastcgi_script_name;
           fastcgi_param PATH_INFO $fastcgi_path_info;
       }

There’s lots going on here in this file but some important items to note. Nginx acts like a reverse proxy when handling PHP files. It simply takes the request and sends to php-fpm. The php-fpm service finds the request file locally, executes PHP on it, and sends the resulting processed output from PHP back to Nginx. Here is the full updated configMap:

apiVersion: v1
 kind: ConfigMap
 metadata:
   name: webserver-config
   labels:
     tier: backend
 data:
   config :
     server {
         listen       80;
         server_name  localhost;
  
         location / {
             root   /usr/share/nginx/www/html;
             index  index.html index.htm;
         }
  
         error_page   500 502 503 504  /50x.html;
         location = /50x.html {
             root   /usr/share/nginx/www/html;
         }
  
       location ~ .php$ {
           root /usr/share/nginx/www/html;
           try_files $uri =404;
           fastcgi_split_path_info ^(.+.php)(/.+)$;
           fastcgi_pass phpfpm:9000;
           fastcgi_index index.php;
           include fastcgi_params;
           fastcgi_param SCRIPT_FILENAME $document_root$fastcgi_script_name;
           fastcgi_param PATH_INFO $fastcgi_path_info;
       }
  
     }

Let’s apply this to our cluster:

# kubectl apply -f configmap.yaml 
 configmap/webserver-config configured

With the new configuration running, we’ll need Nginx to reload it. There’s a number of different ways we could do this but I’m going to use a hack that will allow us to test the config and then restart. First step, I want to make sure the new config will work for us:

# kubectl exec -it webserver-8fb84dc86-7xw4w -c webserver -- /usr/sbin/nginx -t
 nginx: the configuration file /etc/nginx/nginx.conf syntax is ok
 nginx: configuration file /etc/nginx/nginx.conf test is successful

It looks like the configuration is acceptable so let’s reload Nginx.

# kubectl exec -it webserver-8fb84dc86-7xw4w -c webserver -- /usr/sbin/nginx -s reload
 2019/12/28 14:01:32 [notice] 2804#2804: signal process started

We should now be ready to commit a PHP file to our repo and test.

Testing Our Configuration

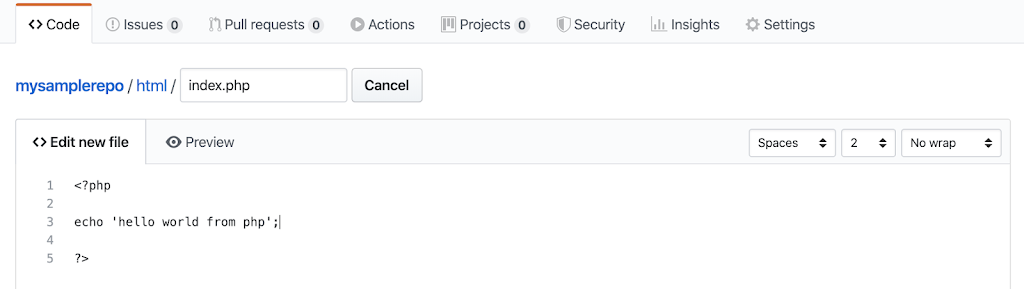
Let’s create a simple PHP file in the html directory of our. 

We’ll jump onto the web server, install curl and test:

# kubectl exec -it webserver-8fb84dc86-7xw4w -c webserver -- /bin/bash
 root@webserver-8fb84dc86-7xw4w:/# apt update
 Hit:1 https://deb.debian.org/debian buster InRelease
 Hit:2 https://deb.debian.org/debian buster-updates InRelease
 Hit:3 https://security-cdn.debian.org/debian-security buster/updates InRelease
 Reading package lists... Done
 Building dependency tree       
 Reading state information... Done
 All packages are up to date.
 root@webserver-8fb84dc86-7xw4w:/# apt install curl
 Reading package lists... Done
 Building dependency tree       
 Reading state information... Done
 curl is already the newest version (7.64.0-4).
 0 upgraded, 0 newly installed, 0 to remove and 0 not upgraded.
 root@webserver-8fb84dc86-7xw4w:/# curl localhost/index.php
  
 hello world from php

A great question to ask is how does php-fpm know which file and where that file exists? Like I said, great question.

This is handled by the fastcgi_param SCRIPT_FILENAME entry. This means that Nginx is going to tell php-fpm that it should try to load the $document_root$fastcgi_script_name file for the request. If you look at our configMap, we define document root as /usr/share/nginx/www/html. Assuming a request comes for index.php into Nginx, Nginx will tell php-fpm to also load /usr/share/www/html/index.php. In an environment where Nginx + PHP live on the same host, this doesn’t appear to be a problem because that file will exist for sure. In our configuration, we running two separate hosts aka containers. So we need to make sure the file exists on both servers in the same location. That’s the easy part! It does! Reason being, we’re using gitsynch on both containers and mounting that synched directory to the same location!

Full Working Configs

In case you want to just cheat and load the configurations, feel free to download them and play around:

Building a Kubernetes Container That Synchs with Private Git Repo

My previous post explained how to create a private git repo. On its own, that post is roughly useless unless you planned to maintained some private copy of your project so nobody can see it. In this post, we’re going to put that private repo to use in a Kubernetes environment. A basic assumption is that you already have a Kubernetes environment setup.

Adding Another SSH Key to the Repo

The first step would be to add another SSH Key to our repo. The purpose of this key is to be used to configure access from the container to the repo. We’ll load the SSH key into Kubernetes as a secret. We can’t set a password on this key or we might get prompted for the password during container build and that’s not useful. Also, since the key will not have a password, we won’t give it Read / Write access to our repo.

Generate the SSH Key

As before, we’re going to run the ssh-keygen command but we’ll specify the file where to save the key and just simply hit enter at the password prompt so that it’s not password protected.

imacs-imac:~ scott$ ssh-keygen -t rsa
 Generating public/private rsa key pair.
 Enter file in which to save the key (/Users/scott/.ssh/id_rsa): /Users/scott/.ssh/GH_RO_key_rsa
 Enter passphrase (empty for no passphrase): 
 Enter same passphrase again: 
 Your identification has been saved in /Users/scott/.ssh/GH_RO_key_rsa.
 Your public key has been saved in /Users/scott/.ssh/GH_RO_key_rsa.pub.
 The key fingerprint is:
 SHA256:0v0koHVNHdJbt4j2PaNorHa25dXgNl0sQjJB8R3ClPA [email protected]
 The key's randomart image is:
 +---[RSA 2048]----+
 |         .===+o. |
 |           *o+o.o|
 |        o + E ooo|
 |       + + * ..o |
 |      o S + + + o|
 |       .   + + Bo|
 |          . o.=.=|
 |         . *oo.. |
 |        ..=...   |
 +----[SHA256]-----+
 imacs-imac:~ scott$ 

Upload the Key to our Git Repo

With our new SSH Key created, we’ll want to once again take the contents of the .pub file aka GH_RO_key_rsa.pub if you’re following along and paste that into our repo’s Deploy Keys like below:

Be sure that Allow write access is NOT selected and paste in the contents of the pub file to the Key box. Next, click Add Key. You should now have two keys listed:

Configuring Kubernetes

Now that we have our new Read Only key added to the repo, it’s time to setup Kubernetes. This is going to be a simple configuration so that we can display static HTML pages on our Kubernetes cluster.

Add SSH Key to Kubernetes

In order to have Kubernetes be able to use the SSH key, we need to add it as a secret that we’ll reference in our pod deployment. The first step is to create a known hosts file to be used along with the key so we don’t have to worry about acknowledging any new key messages.

~# ssh-keyscan github.com > /tmp/known_hosts
 # github.com:22 SSH-2.0-babeld-778045a0
 # github.com:22 SSH-2.0-babeld-778045a0
 # github.com:22 SSH-2.0-babeld-778045a0
 ~# 

This copies the ssh key from github into the /tmp/known_hosts file. Next, we need to get the contents of our private key file. When we pasted the key into GitHub, we were working with the public key file..aka the .pub file…Since Kubernetes will need to authenticate using this key, it’ll need the private key file…aka the GH_RO_key_rsa file. We’ll use the kubectl command to add the key into Kubernetes:

~# kubectl create secret generic github-creds --from-file=ssh=.ssh/GH_RO_key_rsa --from-file=known_hosts=/tmp/known_hosts
 secret/github-creds created
 ~# 

Creating the Web Server Deployment

Now we’re going to create a YAML file to configure and setup everything. The start of that YAML file will be to configure Kubernetes to open a port that directs traffic to port 80 of our resulting pod. From there, we’ll need to setup a pod that runs two separate containers. One container will be our git-synch application and the other will be nginx. We could get into some “complex” discussions and added costs of running a PVC or some other Kubernetes shared storage but we’re only dealing with a small web site that is synched with github so we’re gonna simply leverage local storage on each node by defining two volumes:

      volumes:
       - name: dir
         emptyDir: {}
       - name: git-secret
         secret:
           secretName: github-creds
           defaultMode: 288

This creates two volumes dir and git-secret. The dir is simply an empty directory volume that we’ll be filling with our files that we synch from Github. The git-secret is the SSH Key we added above. This needs to be made available to our git-synch container. 

In the nginx container, we’re going to mount the dir volume as /usr/share/nginx. The default nginx image looks for web content, aka document root, in /usr/share/nginx/html. Therefore, we’re going mount the repo as /usr/share/nginx. We mount the dir volume to /git as this is where we’re going to write our synched data.

You can see all of these configurations in the git-synch container configuration such as the target location for our synched files as well as the secret to use.

      containers:
       - env:
         - name: GIT_SYNC_REPO
           value: [email protected]:<some user>/mysamplerepo.git
         - name: GIT_SYNC_BRANCH
           value: master
         - name: GIT_SYNC_SSH
           value: "true"
         - name: GIT_SYNC_PERMISSIONS
           value: "0777"
         - name: GIT_SYNC_DEST
           value: www
         - name: GIT_SYNC_ROOT
           value: /git
         name: git-sync
         image: k8s.gcr.io/git-sync:v3.1.1
         securityContext:
           runAsUser: 65533 # git-sync user
         volumeMounts:
         - name: git-secret
           mountPath: /etc/git-secret
         - name: dir
           mountPath: /git

You’ll want to make sure you change the GIT_SYNC_REPO to match the value of your clone/download link in Github. The GIT_SYNC_DEST should match the name of your repo.

Here is the full config for reference:

apiVersion: v1
 kind: Service
 metadata:
   name: webserver
   labels:
     tier: backend
 spec:
   selector:
     app: webserver
     tier: backend
   ports:  
   - name: http
     port: 80
 ---
 apiVersion: apps/v1
 kind: Deployment
 metadata:
   name: webserver
   labels:
     tier: backend
 spec:
   replicas: 1
   selector:
     matchLabels:
       app: webserver
       tier: backend
   template:
     metadata:
       labels:
         app: webserver
         tier: backend
     spec:
       securityContext:
         fsGroup: 65533 # to make SSH key readable
       volumes:
       - name: dir
         emptyDir: {}
       - name: git-secret
         secret:
           secretName: github-creds
           defaultMode: 288
       containers:
       - env:
         - name: GIT_SYNC_REPO
           value: [email protected]:<some user>/mysamplerepo.git
         - name: GIT_SYNC_BRANCH
           value: master
         - name: GIT_SYNC_SSH
           value: "true"
         - name: GIT_SYNC_PERMISSIONS
           value: "0777"
         - name: GIT_SYNC_DEST
           value: www
         - name: GIT_SYNC_ROOT
           value: /git
         name: git-sync
         image: k8s.gcr.io/git-sync:v3.1.1
         securityContext:
           runAsUser: 65533 # git-sync user
         volumeMounts:
         - name: git-secret
           mountPath: /etc/git-secret
         - name: dir
           mountPath: /git
       - name: webserver
         image: nginx:latest
         ports:
         - containerPort: 80
         volumeMounts:
         - name: dir
           mountPath: /usr/share/nginx

With out configuration file all ready to go, we’ll use kubectl to apply the file:

~# kubectl apply -f webserver.yaml 
 service/webserver created
 deployment.apps/webserver created
 ~# 

After some time, we should be able to check the status and see the pod is online and the service is setup:

~# kubectl get pod
 NAME                         READY   STATUS    RESTARTS   AGE
 webserver-686854f667-cwq5f   2/2     Running   5          3m46s
 ~# kubectl get svc
 NAME         TYPE        CLUSTER-IP       EXTERNAL-IP   PORT(S)   AGE
 kubernetes   ClusterIP   blog.shellnetsecurity.com     <none>        443/TCP   149m
 webserver    ClusterIP   blog.shellnetsecurity.com   <none>        80/TCP    5m28s
 ~# 

Testing the Deployment

With everything deployed, we should have a web server up and running that is serving our git repo from the previous post. Without getting into deploying an ingress server and such, let’s take a short cut to test out our deployment. We can do this by connecting to the web server and doing a curl. First, we connect to the web server container:

# kubectl exec -it webserver-686854f667-cwq5f -c webserver /bin/bash

The above command will connect you to a shell in the container. By default, the nginx image does not have curl installed so we’ll need to install this to test further. Install curl using the below commands:

root@webserver-686854f667-cwq5f:/# apt update;apt -y install curl

With curl installed, let’s connect to the local web server:

root@webserver-686854f667-cwq5f:/# curl localhost
 <html>
 <head><title>403 Forbidden</title></head>
 <body>
 <center><h1>403 Forbidden</h1></center>
 <hr><center>nginx/1.17.6</center>
 </body>
 </html>

That does not seem right…I broke something…didn’t I? Oh wait, I know let’s try…

root@webserver-686854f667-cwq5f:/# curl localhost/html/
 <html>
 <body>
 hello world!
 </body>
 </html>

That works better. Looks like we need to fix something here but first let’s see if making a change to the repo works. Let’s cheat and use the github file editor and make a change to the index.html file like the below:

If we run our curl again, survey says….

root@webserver-686854f667-cwq5f:/# curl localhost/html/
 <html>
 <body>
 hello world! Test #2
 </body>
 </html>

Boom! Just like that it’s working. Kinda…

Fixing Our Deployment

In case the problem isn’t quite obvious, we are attempting to mount the git repo in a location that nginx isn’t quite looking for. It’s a bad idea to mount the entire git repo as the document root since it could allow people to look at your .git directory and possibly other files that you didn’t consider. In order to fix our deployment and secure just a little further we’re going to first adjust the nginx configuration with a Kubernetes configmap:

apiVersion: v1
 kind: ConfigMap
 metadata:
   name: webserver-config
   labels:
     tier: backend
 data:
   config :
     server {
         listen       80;
         server_name  localhost;
     
         location / {
             root   /usr/share/nginx/www/html;
             index  index.html index.htm;
         }
     
         error_page   500 502 503 504  /50x.html;
         location = /50x.html {
             root   /usr/share/nginx/www/html;
         }
    
     }

This configmap supplies nginx with a new configuration for the default site that tells nginx that the document root is now located in /usr/share/nginx/www/html. We also made some changes to the original webserver.yaml to add this new configuration as well as changing the mount point for git and nginx. The full configuration is here.

apiVersion: v1
 kind: ConfigMap
 metadata:
   name: webserver-config
   labels:
     tier: backend
 data:
   config :
     server {
         listen       80;
         server_name  localhost;
         location / {
             root   /usr/share/nginx/www/html;
             index  index.html index.htm;
         }
         error_page   500 502 503 504  /50x.html;
         location = /50x.html {
             root   /usr/share/nginx/www/html;
         }
     }
 ---
 apiVersion: v1
 kind: Service
 metadata:
   name: webserver
   labels:
     tier: backend
 spec:
   selector:
     app: webserver
     tier: backend
   ports:  
   - name: http
     port: 80
 ---
 apiVersion: apps/v1
 kind: Deployment
 metadata:
   name: webserver
   labels:
     tier: backend
 spec:
   replicas: 1
   selector:
     matchLabels:
       app: webserver
       tier: backend
   template:
     metadata:
       labels:
         app: webserver
         tier: backend
     spec:
       securityContext:
         fsGroup: 65533 # to make SSH key readable
       volumes:
       - name: dir
         emptyDir: {}
       - name: git-secret
         secret:
           secretName: github-creds
           defaultMode: 288
       - name: config
         configMap:
           name: webserver-config
           items:
           - key: config
             path: default.conf
       containers:
       - env:
         - name: GIT_SYNC_REPO
           value: [email protected]:<some user>/mysamplerepo.git
         - name: GIT_SYNC_BRANCH
           value: master
         - name: GIT_SYNC_SSH
           value: "true"
         - name: GIT_SYNC_PERMISSIONS
           value: "0777"
         - name: GIT_SYNC_DEST
           value: www
         - name: GIT_SYNC_ROOT
           value: /git
         name: git-sync
         image: k8s.gcr.io/git-sync:v3.1.1
         securityContext:
           runAsUser: 65533 # git-sync user
         volumeMounts:
         - name: git-secret
           mountPath: /etc/git-secret
         - name: dir
           mountPath: /git
       - name: webserver
         image: nginx:latest
         ports:
         - containerPort: 80
         volumeMounts:
         - name: dir
           mountPath: /usr/share/nginx
         - name: config
           mountPath: /etc/nginx/conf.d

Let’s apply this updated configuration using kubectl:

root@do-nyc04:/tmp# kubectl apply -f webserver.yaml 
 configmap/webserver created
 service/webserver unchanged
 deployment.apps/webserver configured

Let’s now reconnect and test our configuration:

root@do-nyc04:/tmp# kubectl get pod -o wide
 NAME                         READY   STATUS    RESTARTS   AGE    IP             NODE              NOMINATED NODE   READINESS GATES
 webserver-8fb84dc86-5chm5    2/2     Running   0          17s    blog.shellnetsecurity.com    pool-sfo01-ssy1   <none>           <none>
 root@do-nyc04:/tmp# kubectl exec -it webserver-8fb84dc86-5chm5 -c webserver /bin/bash
 root@webserver-8fb84dc86-5chm5:/# apt update;apt -y install curl
 Get:1 https://deb.debian.org/debian buster InRelease [122 kB]
 Get:2 https://deb.debian.org/debian buster-updates InRelease [49.3 kB]             
 Get:3 https://security-cdn.debian.org/debian-security buster/updates InRelease [65.4 kB]
 Get:4 https://deb.debian.org/debian buster/main amd64 Packages [7908 kB]
 Get:5 https://deb.debian.org/debian buster-updates/main amd64 Packages [5792 B]
 Get:6 https://security-cdn.debian.org/debian-security buster/updates/main amd64 Packages [167 kB]
 Fetched 8317 kB in 2s (3534 kB/s)                         
 Reading package lists... Done
 Building dependency tree       
 Reading state information... Done
 All packages are up to date.
 Reading package lists... Done
 Building dependency tree       
 Reading state information... Done
 The following additional packages will be installed:
 ...
 128 added, 0 removed; done.
 Setting up libgssapi-krb5-2:amd64 (1.17-3) ...
 Setting up libcurl4:amd64 (7.64.0-4) ...
 Setting up curl (7.64.0-4) ...
 Processing triggers for libc-bin (2.28-10) ...
 Processing triggers for ca-certificates (20190110) ...
 Updating certificates in /etc/ssl/certs...
 0 added, 0 removed; done.
 Running hooks in /etc/ca-certificates/update.d...
 done.
  
 root@webserver-8fb84dc86-5chm5:/# curl localhost
 <html>
 <body>
 hello world! Test #2
 </body>
  
 </html>

Great news! It looks like it’s fixed. Just to make sure things are working still, let’s make another change and see if it publishes.

root@webserver-8fb84dc86-5chm5:/# curl localhost
 <html>
 <body>
 hello world! Everything must be cleaned up at this point
 </body>
 </html>

W00t! Looks like everything is working and as we expect. Although, this configuration is mostly useless unless you are actually within the Kubernetes cluster. For the next article, I’ll provide some options and a hack for exposing this web server to the world.

Creating a Private GitHub Repo

The first step in my adventure was to first create a location to store my web content. The mostly likely location for this was GitHub. The process for signing up for a GitHub account is pretty easy so I won’t bother going through that process here. I’m going to assume that you figured that part out and I will begin with that assumption.

 Setting Up a Private GitHub Repo

Once you have your account, you’ll need to next setup your very first repo. Login to GitHub and click on the “New” button to create a repo
On the resulting screen:
  1. Enter a name for your repo
  2. Enter a description if you like
  3. We’re creating a private repo here because we don’t want anyone messing with it or having access to it (more on that in a future post).
  4. Let’s also initialize the repo with a blank README. This way you can add notes to the repo later if you have anything specific to remind yourself of

The configuration should look something like this:

  1. Click the Create repository button and like magic you have your very own Private repo!
Make note of the “Private” listed at the top of the repo. This lets you know that the repo is not available to the public on GitHub. Only those that have been specifically granted access will be permitted to view the contents and make changes.

Granting Access to the Repo Via Deploy Keys

Now that we have this private repo created, we need to be able to grant access to it for anyone or anything that will want to make changes to it. In order to do this, we’re going to generate a SSH key on our client machine so that we can have access via CLI (Sorry, I work is much from CLI as possible). These instructions will help you generate the ssh key and add it to the repo’s settings.

Generating the SSH Keys

First, we’ll need to generate our ssh keys that we intend to use for the repo. To do this, pop open a terminal window and run the ssh-keygen command as shown below. We’re going to make this key capable or performing Read and Write operations in our repo so be sure to supply a password when generating the key.

imacs-imac:~ scott$ ssh-keygen -t rsa
Generating public/private rsa key pair.
Enter file in which to save the key (/Users/scott/.ssh/id_rsa):
Created directory '/Users/scott/.ssh'.
Enter passphrase (empty for no passphrase):
Enter same passphrase again:
Your identification has been saved in /Users/scott/.ssh/id_rsa.
Your public key has been saved in /Users/scott/.ssh/id_rsa.pub.
The key fingerprint is:
SHA256:o16ykEsBSueHW4G/Qu4a/5U26nfYsdrdbAUkxN60xFk [email protected]
The key's randomart image is:

+---[RSA 2048]----+
|          o.. oE |
|    .      o *   |
| ..o .    . * .  |
|..o.o .    . +   |
|.  +.+  S     .  |
|  o +o…o     . |
| . ++.o=+ o   .  |
|  +..++*o+. o.   |
| ..o+++.o. ..o   |
+----[SHA256]-----+

This is generating a new ssh key that is protected by a password. The key will be called id_rsa and be located in the default location of ~/.ssh.

Adding the SSH Key to Our Repo

Now that we have our SSH Key, we will need to give it permissions to our repo. We go back to our repo on GitHub and click on the Settings link towards the top of the screen. From there, click on the Deploy Keys link on the left navigation menu. You should be looking at a screen similar to the below page:

Click the Add Deploy Key button on the Deploy keys page. Go back to your CLI (or however you wanna get the contents of the file) and dump the contents of your public key file (aka the one that ends in .pub). The private one (aka the one WITHOUT .pub should not be shared with anyone). You can see below how I’ve gotten the contents using cat.

imacs-imac:~ scott$ cat /Users/scott/.ssh/id_rsa.pub
 
ssh-rsa AAAAB3NzaC1yc2EAAAADAQABAAABAQDCHVTkeP69+YLgiyWx9+DQ9TFftis6kiJMDTr/hi4nqzHlGdDUR78fy/kfAzU
Wu5cwaiuTpxvXtFK2FA+qrAoNqOzKecaVRv017PxznbRQhZ+FIfbKRua3Gt3rGSzrMvOErmL1He23jO5OZZAqpkt97E5kGO1gFmt
fb90moXDyE0GC6s/3dVcZdEDw+uge6toBF9BGO27lFtdwIs3x3rUj88BcACfi0D/0nkFxK3UjgaEuAcICpneKfVhd/jY5DnguCD5ST5lTi
Z/9hNDKfU4L1sQ0jz9gdmGhBpxpW3lRYWxBHadxKNYZFSI0IFO5VAFecNzgo/eSerIi2A9ahmTX 
[email protected]

Copy the entire contents of this file and go back to the Add deploy key screen on GitHub. Paste the contents into the Key field. Give it a Title and be sure to check the Allow write access box as shown below:

Once that is done, click the Add key button to add the key. If you were successful, you should see something like the following:

Synching With Our Repo

Now that we have the repo setup and access granted, we’ll want to do our first commit to it. In order to do that, we first need to add our ssh repo key to our ssh agent. We do this by using the ssh-add -k command. This will prompt for the password you used when creating the key and upon successful authentication, your key will be added.

imacs-imac:~ scott$ ssh-add -k /Users/scott/.ssh/id_rsa
 Enter passphrase for /Users/scott/.ssh/id_rsa: 
 Identity added: /Users/scott/.ssh/id_rsa ([email protected])
 imacs-imac:~ scott$ 

With the key loaded, we should be able to clone our repo to our local machine. First we can cheat by getting the clone link for our repo. Go back to the main repo page by clicking on the name of the repo at the top of the page (next to the “Private” tag). This should bring you back to a page similar to this displaying your empty README.

Click the Clone or download button to reveal the link to your repo and then copy the link. The link should look something like:

 [email protected]:<my_git_user>/mysamplerepo.git

where my_git_user is your GitHub username. With that copied, let’s go back to our terminal and do a clone to get the repo on our local machine.

imacs-imac:~ scott$ git clone [email protected]:<my_git_user>/mysamplerepo.git
 Cloning into 'mysamplerepo'...
 The authenticity of host 'github.com (192.30.253.112)' can't be established.
 RSA key fingerprint is SHA256:nThbg6kXUpJWGl7E1IGOCspRomTxdCARLviKw6E5SY8.
 Are you sure you want to continue connecting (yes/no)? yes
 Warning: Permanently added 'github.com,192.30.253.112' (RSA) to the list of known hosts.
 remote: Enumerating objects: 3, done.
 remote: Counting objects: 100% (3/3), done.
 remote: Total 3 (delta 0), reused 0 (delta 0), pack-reused 0
 Receiving objects: 100% (3/3), done.
 imacs-imac:~ scott$ 

You should now have a directory called mysamplerepo on your machine.

imacs-imac:~ scott$ ls -al mysamplerepo/
 total 8
 drwxr-xr-x   4 scott  staff  136 Dec 20 15:41 .
 drwxr-xr-x+ 22 scott  staff  748 Dec 20 15:41 ..
 drwxr-xr-x  13 scott  staff  442 Dec 20 15:41 .git
 -rw-r--r--   1 scott  staff   14 Dec 20 15:41 README.md

Now we’ve got a local copy of our repo…yaaaaay!

Committing Our First Change From Local Machine

Now that we’ve got our repo, we’ll want to next set this up for some feature articles. The first step is to create an html directory within the repo and add a simple html file to it.

imacs-imac:mysamplerepo scott$ mkdir html
 imacs-imac:mysamplerepo scott$ cd html/
 imacs-imac:html scott$ vi index.html

Inside the index.html, I put our obligatory “hello world” for now.

<html>
 <body>
 hello world
 </body>
 </html>

Save the contents of the file (:wq) for those following along with CLI. From there, we’ll need to add our untracked files…aka git add and then commit the changes and push them to the repo.

imacs-imac:html scott$ cd ..
 imacs-imac:mysamplerepo scott$ git add .
 imacs-imac:mysamplerepo scott$ git commit -a
 [master 6d43978] Creating our first deployment
  Committer: Scott <[email protected]>
 Your name and email address were configured automatically based
 on your username and hostname. Please check that they are accurate.
 You can suppress this message by setting them explicitly. Run the
 following command and follow the instructions in your editor to edit
 your configuration file:
  
     git config --global --edit
  
 After doing this, you may fix the identity used for this commit with:
  
     git commit --amend --reset-author
  
  1 file changed, 5 insertions(+)
  create mode 100644 html/index.html
 imacs-imac:mysamplerepo scott$ git push origin master
 Warning: Permanently added the RSA host key for IP address '140.82.113.4' to the list of known hosts.
 Counting objects: 4, done.
 Delta compression using up to 4 threads.
 Compressing objects: 100% (2/2), done.
 Writing objects: 100% (4/4), 368 bytes | 368.00 KiB/s, done.
 Total 4 (delta 0), reused 0 (delta 0)
 To github.com:algattsm/mysamplerepo.git
    89800ef..6d43978  master -> master
 imacs-imac:mysamplerepo scott$ 

I cheated and just moved up one directory so I’m sure to add the html directory and the contents of it to my commit. Running git add . will make sure we grab all of the new (aka untracked) files to the commit. Then the git commit -a says to comment all of our changes and we give a reason. Finally, the git push origin master commits all of changes to our repo. Let’s go check and see if this all happened properly.

If you go to GitHub in your browser again and refresh the page, you should see the html directory and it should contain the index.html file we created.

Looks like I did something right! Hopefully at this point, so did you.

What Does it all Mean and What’s Next?

Glad you asked. It’s means nothing at this point but it’s a step in the direction I took. At this point, you and I should be successful at creating a private repo and being able to publish content to it. High-five bro! Until the next article!

Stay Tuned…

This is just a placeholder for what is to come. I decided to start tinkering around with Kubernetes and getting it to do “fun” stuff. This will be my first of future posts to explain how I have my personal website setup and running using a combination of:

  • Kubernetes
  • Private GitHub Repo
  • Nginx
  • PHP
After a little discussion and examples on these, I hope to put it all together and show how I have things configured and running.

The other purpose of starting this blog was to help me capture some of the steps taken along the way. I’ve looked at random configurations, examples, setups, websites…etc… I’ve also done some random trial and error steps and somehow got things working. In addition to providing steps to success for others, I’m intending to use this to also act as documentation for myself.

So as the title of this first post says, stay tuned as I recreate and document my environment via this blog.