
The future is here! In my previous article, Testing Out the Digital Ocean Container Registry, I talked about using the Digital Ocean Container Registry to build a custom nginx. In that article, I talked about the future, aka a future, aka this post. When I moved to WordPress, I did so using Digital Ocean’s 1-Click install to drop WordPress into my Kubernetes cluster. This was the easy way to go for sure. I already run Kubernetes so deploying it to an existing cluster made life easier on me. Who doesn’t love it when life is made easier?
There are a few drawbacks to the 1-Click install. I’m planning to tinker with something really cool down the road to fix one of those problems (I know the future again). Luckily, I’m going to address my first initial concern in this post. What is that concern you ask? Protecting my WordPress admin of course! Sure, there are a number of WordPress vulnerabilities roaming around and talks of zero days and the sort. I make life easier on any attacker if I just leave my WordPress admin open to anyone. In this post, we look at taking my custom nginx and deploying it in front of my WordPress site to enforce IP access control to the admin page.
Setting Up the Container Registry for Kubernetes
In my Testing Out the Digital Ocean Container Registry, I explained how to get a custom nginx into the Container Registry. In order to use that container and registry with my cluster, I had to enable DigitalOcean Kubernetes integration in the settings of the registry. You can do the same by doing the following:
- Login to your DigitalOcean account
- Go to the Container Registry link
- Click on the Settings tab of the Container Registry
- Click the Edit button next to DigitalOcean Kubernetes Integration
- Place a check mark next to the Kubernetes clusters that you want to have access to this registry (Note, if you have multiple namespaces, this action will add access for all namespaces).
Once these steps are complete, you can confirm access by looking for a new secrets in your cluster:
# kubectl get secrets
NAME                   TYPE                                  DATA   AGE
default-token          kubernetes.io/service-account-token   3      423d
json-key               kubernetes.io/dockerconfigjson        1      396d
k8-registry            kubernetes.io/dockerconfigjson        1      18d
key-secret             Opaque                                2      419d
Notice the k8-registry secret that I now have in my secrets list? You can also see that this exists in my wordpress namespace as well:
# kubectl get secrets -n wordpress
NAME                  TYPE                                  DATA   AGE
default-token         kubernetes.io/service-account-token   3      18d
k8-registry           kubernetes.io/dockerconfigjson        1      18d
wp                    Opaque                                1      18d
wp-db                 Opaque                                2      18d
Adding Nginx to the Cluster
This should be super easy! I start by first creating configMap that stores my Nginx configuration:
apiVersion: v1
kind: ConfigMap
metadata:
  name: nginx-config
  namespace: wordpress
  labels:
    app: nginx
    release: wordpress
data:
  siteConfig: |
    server {
        listen 8080 default_server;
        listen [::]:8080 default_server;

        root /var/www/html;

        index index.html index.htm index.nginx-debian.html;

        server_name _;

        location /status {
                return 200 "healthy\n";
        }

        location / {
                proxy_pass https://wordpress;
                proxy_set_header Host blog.shellnetsecurity.com;
                proxy_set_header X-Forwarded-For $remote_addr;
        }

        location /admin {
                allow 1.1.1.1;
                allow 2.2.2.2;
                deny all;
                proxy_pass https://wordpress;
                proxy_set_header Host blog.shellnetsecurity.com;
                proxy_set_header X-Forwarded-For $remote_addr;
        }

        location /wp-admin {
                allow 1.1.1.1;
                allow 2.2.2.2;
                deny all;
                proxy_pass https://wordpress;
                proxy_set_header Host blog.shellnetsecurity.com;
                proxy_set_header X-Forwarded-For $remote_addr;
        }
    }

  serverConfig: |
    user www-data;
    worker_processes auto;
    pid /run/nginx.pid;
    include /etc/nginx/modules-enabled/*.conf;

    events {
        worker_connections 768;
    }

    http {
        sendfile on;
        tcp_nopush on;
        tcp_nodelay on;
        keepalive_timeout 65;
        types_hash_max_size 2048;
        include /usr/local/nginx/conf/mime.types;
        default_type application/octet-stream;
        access_log /dev/stdout;
        error_log /dev/stdout;
        gzip on;

        include /etc/nginx/sites-enabled/*;
    }

    daemon off;
I mostly added a set of standard nginx configurations. If you look at the serverConfig closely, you’ll notice that I’ve directed the access_log and error_log to /dev/stdout. This is so all of the logs are written to stdout (duh). This also allows me to run kubectl logs -f on the created pod and see the access and error logs.
Nginx is going to be acting like a reverse proxy so I took a relatively standard default site-available configuration and added a few new location blocks. The /status block is simply for me to perform healthchecks on the running nginx instance. The other statements are proxy_pass statements to send requests to the “wordpress” pod that was installed by the 1-Click install. I’m also making sure that I send over the Host header with blog.shellnetsecurity.com. If I don’t do this, the 1-Click install will build funky URLs that don’t work. Luckily, it will read the Host header and build links based upon that. I force the host header to be what I want with this statement.
Finally, you’ll see my allow statements for 1.1.1.1 and 2.2.2.2 (not really my IPs but let’s play make believe). These are followed by deny all. This should make it so that only my 1.1.1.1 and 2.2.2.2 addresses are allowed to /admin and /wp-admin. All others will be denied.
Next, I create a Deployment yaml that tells Kubernetes what containers to build and how to use my configMap:
apiVersion: apps/v1
kind: Deployment
metadata:
  name: nginx
  namespace: wordpress
  labels:
    app: nginx
    release: wordpress
spec:
  replicas: 2
  selector:
    matchLabels:
      app: nginx
      release: wordpress
  strategy:
    rollingUpdate:
      maxSurge: 25%
      maxUnavailable: 25%
    type: RollingUpdate
  template:
    metadata:
      labels:
        app: nginx
        release: wordpress
    spec:
      volumes:
      - name: siteconfig
        configMap:
          name: nginx-config
          items:
          - key: siteConfig
            path: default
      - name: serverconfig
        configMap:
          name: nginx-config
          items:
          - key: serverConfig
            path: nginx.conf
      imagePullSecrets:
      - name: k8-registry
      containers:
      - name: nginx
        image: registry.digitalocean.com/k8-registry/c-core-nginx:1.1
        ports:
        - containerPort: 8080
        volumeMounts:
        - name: siteconfig
          mountPath: /etc/nginx/sites-enabled/default
          subPath: default
        - name: serverconfig
          mountPath: /usr/local/nginx/conf/nginx.conf
          subPath: nginx.conf
Take note to the blue colored text above. I am using the imagePullSecrets configuration to tell kubernetes that it will need credentials to access the container registry where my image sits. I am also pointing it to the k8-registry credentials that were added by the DigitalOcean Kubernetes Integration change we made earlier. Finally, I am also providing the full path, version tag included, to the custom image I am hosting in the DigitalOcean registry with the image statement pointing to registry.digitalocean.com/k8-registry/c-core-nginx:1.1.
Next up, I need to add a NodePort that I can configure on the load balancer to send traffic over.
apiVersion: v1
kind: Service
metadata:
  namespace: wordpress
  name: nginx
  labels:
    app: nginx
    release: wordpress
spec:
  selector:
    app: nginx
    release: wordpress
  type: NodePort
  ports:
    - port: 8080
      nodePort: 31645
So I do a little kubectl apply -f to those yaml files I just created. Everything comes up. Next step is to setup the load balancer to forward traffic over. Since I have the nodePort configured as 31645, I just need to tell the load balancer to send traffic that I want to that port. I don’t want to mess with the existing setup so I decide to simply forward http port 8443 over to http port 31645.
Everything should be all set, so let’s open a browser and test
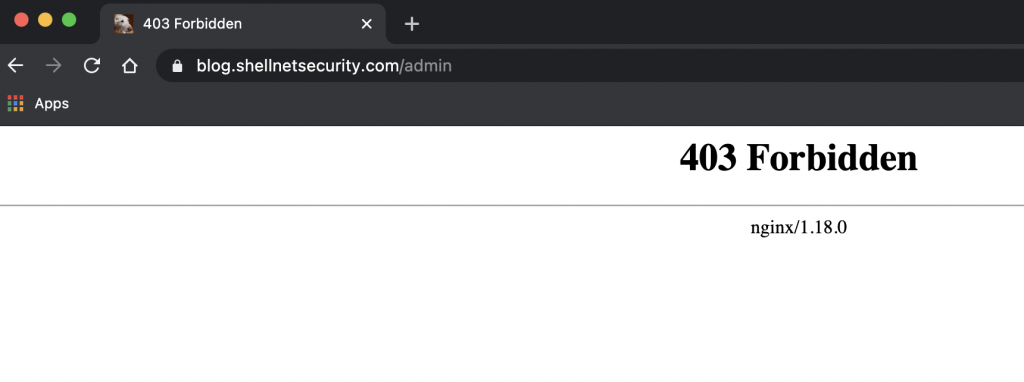
I am getting blocked like I expected! The problem is that I’m coming from my 2.2.2.2 address. What could be the issue? Good thing I told the logs to be sent to stdout so let’s check them for 403s:
kubectl logs -f -n wordpress nginx-9cdf87f68-tss6x|grep 403
...
blog.shellnetsecurity.com - - [20/Dec/2020:13:37:33 +0000] "GET /admin HTTP/1.1" 403 187 "-" "Mozilla/5.0 (Macintosh; Intel Mac OS X 11_1_0) AppleWebKit/537.36 (KHTML, like Gecko) Chrome/87.0.4280.88 Safari/537.36"
...
I see the problem! That is not my 2.2.2.2 address! That was my request though. It seems that I’m not getting the real IP of the client but instead internal IPs from the load balancer.
Enter the PROXY Protocol
For access control, I didn’t want to rely on the X-Forwarded-For header since it is something that comes from the client. This means that someone could spoof the headers to get around my control. In addition to that, the DigitalOcean load balancer does not send this header so it’s a moot point. DigitalOcean does provide the PROXY Procotol in it’s load balancers but not by default. The short explanation is that this protocol will send in the IP like I want but it requires some configuration. It’s either enable PROXY protocol or not as well and there is no mixing or matching.
Enabling the PROXY Protocol on the load balancer was easy. You simply enable it in the Settings of the load balancer.

It is very important to NOT enable this until Nginx was configured. Otherwise, the site would have gone down. I explain my specific configuration below, but you are also welcome to explore the Nginx documentation on the PROXY Protocol.
Configuring Nginx
In my Testing Out the Digital Ocean Container Registry article, I built nginx with the PROXY protocol capability by enabling the ngx_http_realip module. It was like I wrote that previous article after getting this all working….? With the module already enabled, it was pretty easy to simply update the configuration and go. I added the following line to my sever block:
set_real_ip_from blog.shellnetsecurity.com/24;Just like that, I was good to go so I thought. I was now getting denied only sometimes. I checked the logs again to find out why:
kubectl logs -f -n wordpress nginx-9cdf87f68-tss6x
...
blog.shellnetsecurity.com - - [20/Dec/2020:13:37:33 +0000] "GET /admin HTTP/1.1" 403 187 "-" "Mozilla/5.0 (Macintosh; Intel Mac OS X 11_1_0) AppleWebKit/537.36 (KHTML, like Gecko) Chrome/87.0.4280.88 Safari/537.36"
2.2.2.2 - - [20/Dec/2020:18:35:49 +0000] "POST /admin HTTP/1.1" 200 98 "https://blog.shellnetsecurity.com/wp-admin/post.php?post=93&action=edit" "Mozilla/5.0 (Macintosh; Intel Mac OS X 11_1_0) AppleWebKit/537.36 (KHTML, like Gecko) Chrome/87.0.4280.88 Safari/537.36"
3.3.3.3 - - [20/Dec/2020:13:37:33 +0000] "GET /admin HTTP/1.1" 403 187 "-" "Mozilla/5.0 (Macintosh; Intel Mac OS X 11_1_0) AppleWebKit/537.36 (KHTML, like Gecko) Chrome/87.0.4280.88 Safari/537.36"
...
Let’s chat about the set_real_ip_from statement. We need to add this statement for all potential IP addresses that we trust to provide us with the real client IP. In my case, it turned out that blog.shellnetsecurity.com/24 was not a large enough block for the internal IP addresses so I needed to change that to a /16. Also, notice the 3.3.3.3 address? That’s the external IP of one of nodes in the kubernetes cluster. Armed with that knowledge, I expanded my server block to include multiple set_real_ip_from statements:
        set_real_ip_from blog.shellnetsecurity.com/16;
        set_real_ip_from 3.3.3.3;
        set_real_ip_from 4.4.4.4;
        set_real_ip_from 5.5.5.5;
I reloaded everything and tested again and success every time! I got denied when I wasn’t on my 1.1.1.1 or 2.2.2.2 address. I also see others getting denied as well. When I’m sitting on 1.1.1.1 or 2.2.2.2, I’m able to get into my WordPress admin!